1 / 1
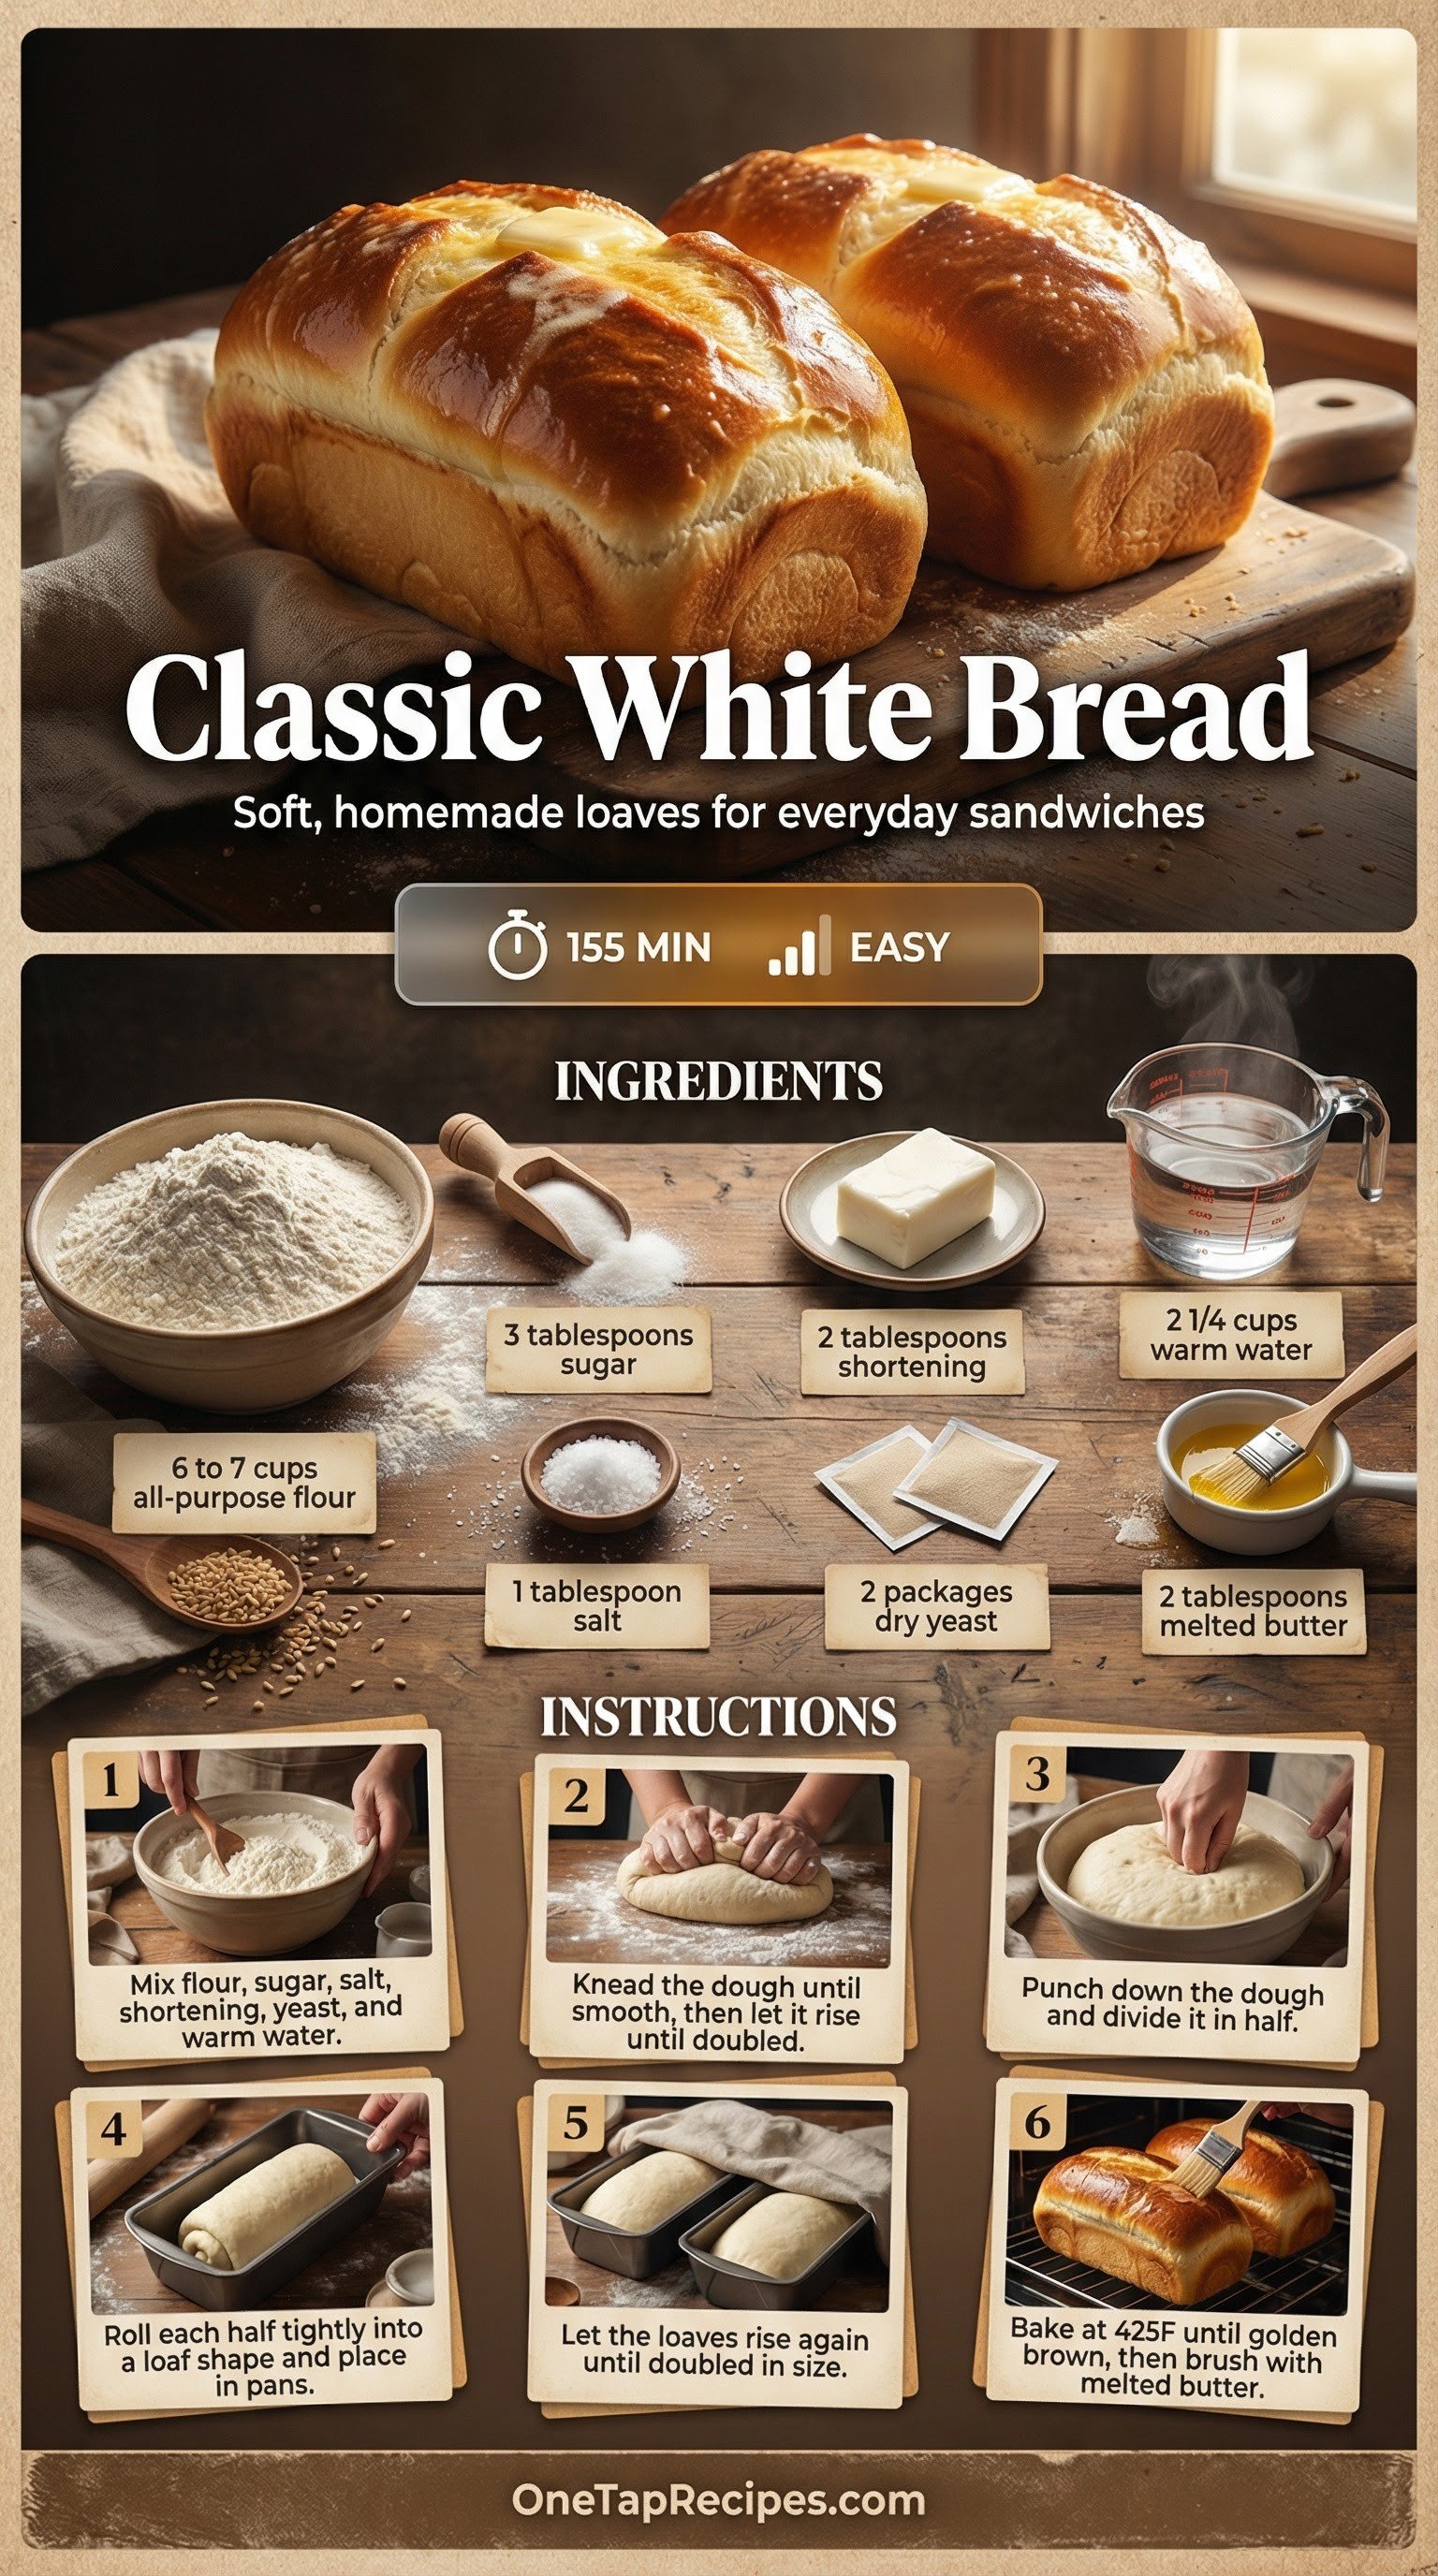
Classic White Bread
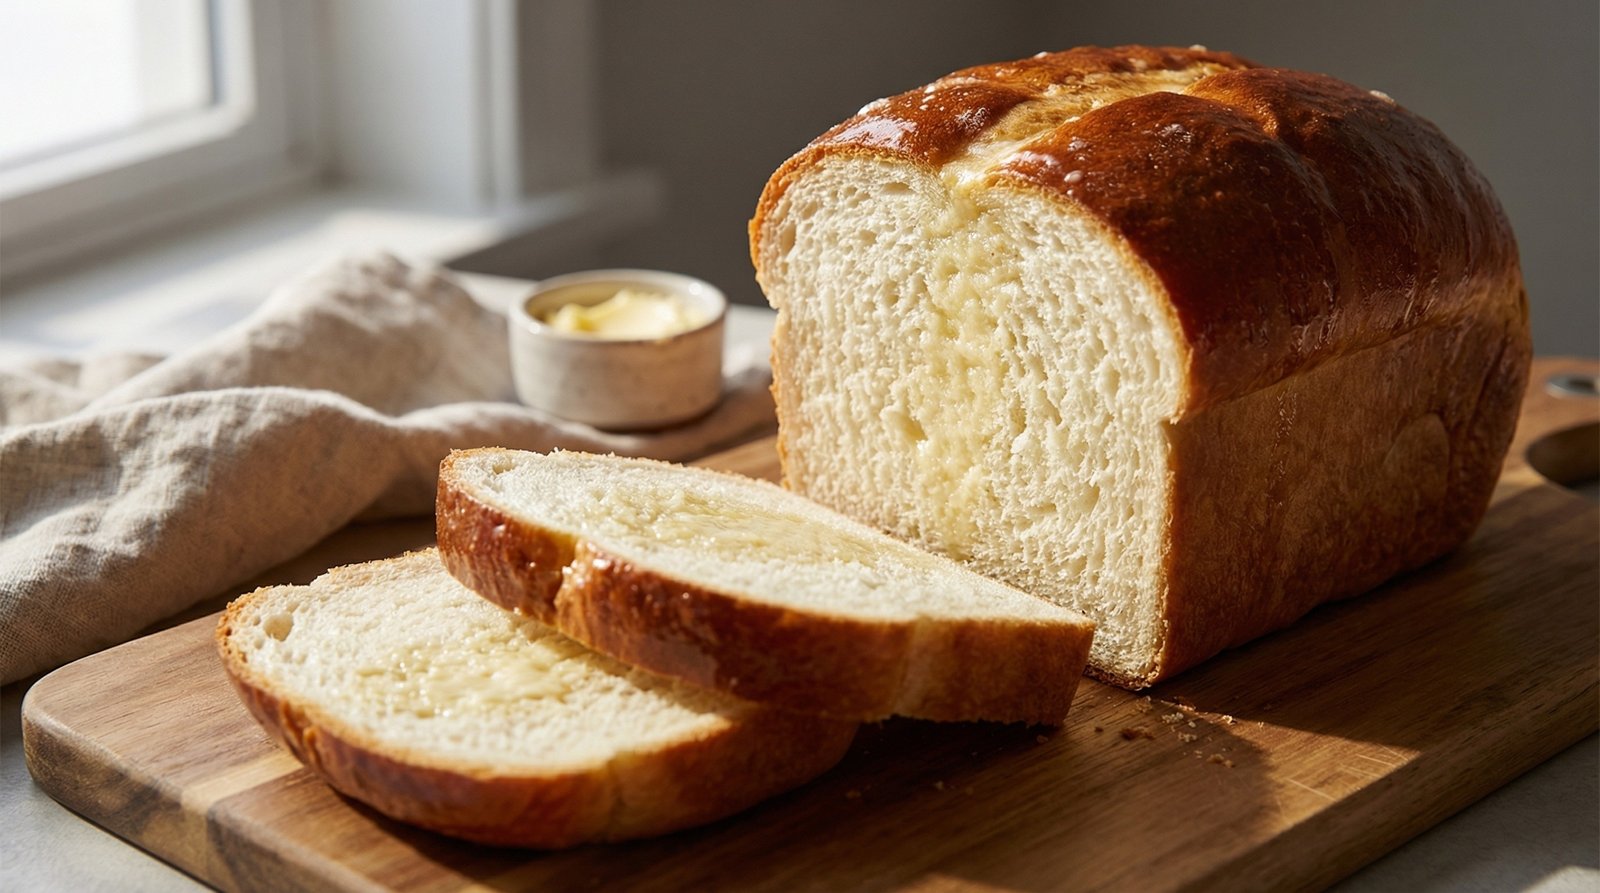
These two loaves of soft, homemade white bread feature a golden crust and a tender crumb. The dough comes together easily with basic pantry staples and requires two standard rises to develop its structure. It is perfect for everyday sandwiches, morning toast, or serving warm with dinner. Brushing the hot loaves with melted butter right out of the oven gives the crust a rich flavor and a soft finish.
Ingredients
- 6 to 7 cups all-purpose or bread flour
- 3 tablespoons sugar
- 1 tablespoon salt
- 2 tablespoons shortening or softened butter
- 2 packages regular active or fast-acting dry yeast (4½ teaspoons)
- 2¼ cups very warm water (120°F to 130°F)
- 2 tablespoons butter, melted, if desired
Instructions
- 1Combine three and a half cups of the flour, the sugar, salt, shortening, and yeast in a large bowl until thoroughly mixed, then pour in the warm water.
- 2Mix the ingredients with an electric mixer on low speed for one minute while scraping down the sides of the bowl, then increase the speed to medium and beat for another minute.
- 3Gradually stir in the remaining flour one cup at a time until the dough becomes manageable and pulls away from the bowl.
- 4Transfer the dough to a lightly floured surface and knead it for ten minutes until it feels smooth and springy, then grease a large bowl with shortening.
- 5Set the dough in the greased bowl and turn it over once to coat all sides. Cover the bowl loosely with plastic wrap and let it rise in a warm spot for 40 to 60 minutes until it doubles in size.
- 6Test the dough by pressing two fingers into it; it is ready if the indentation remains.
- 7Coat the bottoms and sides of two loaf pans with shortening or cooking spray.
- 8Gently punch the dough down to deflate it and divide it into two equal portions. Flatten each half on a lightly floured surface into an 18 by 9 inch rectangle using your hands or a rolling pin.
- 9Starting from the short side, roll the dough up tightly while pressing with your thumbs to seal it after each turn. Pinch the final edge and both ends of the roll to secure the shape.
- 10Tuck the ends under the loaf and place it seam side down into the prepared pan. Repeat with the second loaf, then brush both lightly with one tablespoon of the melted butter.
- 11Cover the pans loosely with plastic wrap and let the loaves rise in a warm area for 35 to 50 minutes until they double in size.
- 12Adjust your oven rack to a low position so the tops of the pans will sit in the center of the oven, then preheat the oven to 425 degrees Fahrenheit.
- 13Bake the bread for 25 to 30 minutes until the loaves turn deep golden brown and sound hollow when tapped on the bottom. Carefully remove the bread from the pans and transfer to a wire cooling rack.
- 14Brush the hot loaves with the remaining one tablespoon of melted butter and allow them to cool completely before slicing.